1/21/21
Doug continues to work on Eagle Everything (Cove, Canyon, Tunnel, Mountain). His latest projects are the bridges over Eagle Canyon. We all know Doug doesn’t do anything half way and this is no exception. Bridges can be made very simply by gluing Micro Engineering bridge girders to the plywood sub roadbed and you have a ballasted deck girder bridge. Not Doug. He has to hack out the whole track, ties, cork, and plywood structure and replace it with a see-through, lacy, super-detailed, deck truss bridge complete with abutments with forming lumber lines and all. It will be a showpiece with not 1 bridge but 2 bridges and a trestle. Big time open house photo location here. He also showed us a sneak preview of some mill structures he’s working on at home. When it’s rainy outside he can’t wreck RC airplanes so he works on building kits. These are very high quality, meticulously weathered and super-detailed. Can’t wait to see them in place.
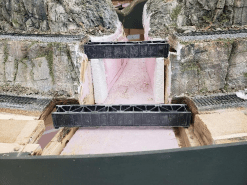
Doug’s handy work included here so you can say you saw it when it first started
Gene is working away on stitching up our mainline. This week he worked himself right out of rail joiners. He got as far west as Ashar (sp) and had to quit. The Whistle Stop hobby shop in Portland is coming to our rescue with 8 packs of Walther’s Code 83 rail joiners. Thank you John. These are pricey little rascals, even with a discount, but hold rails in alignment very well and make great expansion joints.
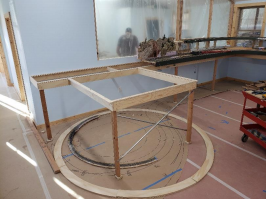
Helix L girders in place. The large circle is the 49″ radius outside curve. The inside curve approximates the reverse loop
George continues to be our framing guy. For 2 days he chased me around with a screw gun and so we started the helix construction. We have been asked to reduce the grade of the helix and that’s been done. Instead of a 2% grade with a short section of 2.1% it will now be 1.7% throughout. In order to do this we had to increase the radius to 49”. We had several considerations when arriving at this radius measurement: 1) upper to lower grade difference of about 12.5 “, 2) reversal of helix direction because our room width was reduced by almost 5 feet which shortened up Philomath and it’s western approach, 3) a location for the reverse loop with a minimum radius of 30”, and 4) the Fire Marshal’s “request” that we not encroach on the hallway to the door. We have accommodated these issues with a really nice design that minimizes hidden trackage and allows for easy access. It will also provide for a “peek inside the tunnel” view.
George traced out patterns for the helix parts. Gene and Doug worked in Gene’s shop to cut out all the parts. Helix L girders were put in place Monday and we started framing the helix base Tuesday. Today – Wednesday – the base was pretty much completed with a finish nailer. Doug and George will screw all the parts together next week.
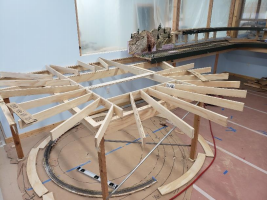
Radial stringers are in place atop the L girders. Note the square access hole in the middle (piece across the access area is a temporary center point). Some of these stringers are cantilevered quite a bit, however, a stout fascia will provide support.
We have reached a few milestones. We can now take out the rest of the paper plan that documented the original layout as it has served its purpose. We just installed the last L girders for the helix – no more L girders. We have only 3 or 4 more lower level stringers to install and those will be complete. Well done, crew. Until next week.
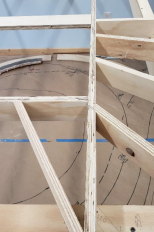
Radial stringers require angled joints
