1/27/21
This week we worked on additional rail joints, Eagle Point, and adding sub-roadbed to the helix. The Whistle Stop delivered on time and under budget with 8 packages (384) of Walther’s code 83 rail joiners for about 1/3 the cost of what we expected. Great deal? Well, not necessarily. They have changed vendors and the current code 83 joiners are very much simplified but still serviceable. Gene, the rail joiner guy, says the jury is still out. He’s used several of them and they work but he has yet to render a final decision. We’ll keep you posted on his deliberations.
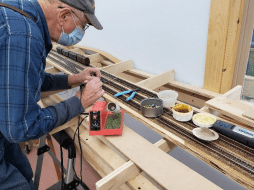
Gene meticulously solders rail joints. He tried blowing the solder fumes away from his face with the mask on but it didn’t work
Doug continues work on Eagle Point and has defined the mountain with pink foam and roughed in the canyon with Sculptamold. rock castings have been laid out and he is deciding upon what type of geologic stratigraphy he wants to incorporate into this yawning chasm. His concept of superposition, faulting, synclines and anticlines will impress even the non-rock hounds. Believe me, graduate students in geology at OSU will have a field day trying to explain all this. Our railroad traverses some amazing landforms and Doug will make them even more spectacular.
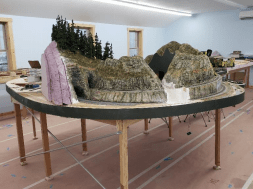
Eagle Point begins to take shape. The pink foam and white canyon are where the geology lesson will take place.
We occasionally pull Doug off his scenic endeavors and make him work on the more mundane aspects of layout building such as sub-roadbed. Last week we completed the radial framing to support our helix and this week we glued up and set the first sub-roadbed circle. It is big – about 8’ in diameter. This is what we need to get our 1.7% grade and 12 ½” rise. We used pocket screws and Titebond II glue to glue up sub-roadbed on Monday and Tuesday we started setting the grade.
Some of us in our golden years can remember the TV series Welcome Back Kotter – the story of an obstreperous kid who came back to his old school as a teacher. His numerous sins were revisited upon him. Kotter can’t hold a candle to the CSME construction crew I work with. To wit: The construction of a helix has, by its very nature, some math involved in its assembly. So my teacher juices started to flow and I asked George and Doug if they wanted me to share some of the math with them or just hand them the screwdrivers and drills and have at it? Doug immediately wanted the drill. Before handing him the tool, I gave a very brief review of radius, diameter, circumference and the concept of Pi. I advised them that we were going to set this grade mathematically and also check it with a level. I figured it would help to have a common vocabulary other than profanity. Doug said “I know all about that stuff, let’s get to work “. “Really”, sez I. “Yup, you know that guy Pith-a GOR-us”, sez Doug. I sez, “that sounds like a dinosaur”. Then I asked “you know about Pith-A-gorus?” Doug sez, “yeah, y’know, he’s really old, always wears a robe and rides around in a chariot”. I sez, “Pythagoras has to do with right triangles, although it does relate to a thing called a unit circle”. Doug sez, “Hand me the drill”. I got him back at lunch.
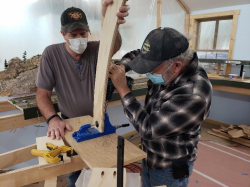
George and Doug drill pocket holes in roadbed using Gene’s Kregg Drilling fixture and guide.
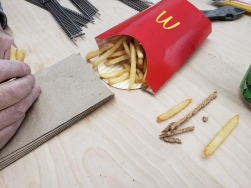
Some “cork fries” were added to Doug’s lunch but he caught them before they went down.
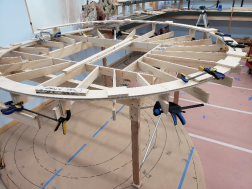
The first turn of the new helix in place and at grade. Note the difference in size when compared with the old helix as drawn on the paper below. This baby is big but it reduces the grade, increases the radius, offsets the top loop, includes a reverse loop, stays out of the hallway, and is mostly visible track. We’ve accommodated most of the design parameters requested by club members.
After all that, we got to work marking off linear measurements of circumference at each stringer around the first circle. Then we multiplied that run in inches times the rise per inch (.0177”) and added the height of the stringer (2.875”). That gave us the total length of riser required at that point. We called out the numbers to George, he accurately cut the risers and we clamped each one to its respective stringer. After we had the base circle set (and ran out of clamps) we used the grade tool to check the grade. We also calculated total circumference and then compared that number to our physical measurements. George and Doug had built the circle so accurately that we were only off by about ½%.
Next week we’ll screw this whole assembly (sub roadbed-risers-stringers) together and begin to lay in the middle level. This will be a much easier task because all we do is use match cut blocking to raise the middle level straight up from the bottom level. The off-set top level will have its own risers and by then George and Doug will be “helix masters”. I’ll just sit back, relax, and watch them put the old guy with the robe and chariot to work.
